This room has been ransacked. The bunks and footlockers have been broken to splinters and spread across the room. A faint mist hangs in the chilly air of the room and the faint smell of iron permeates the area.
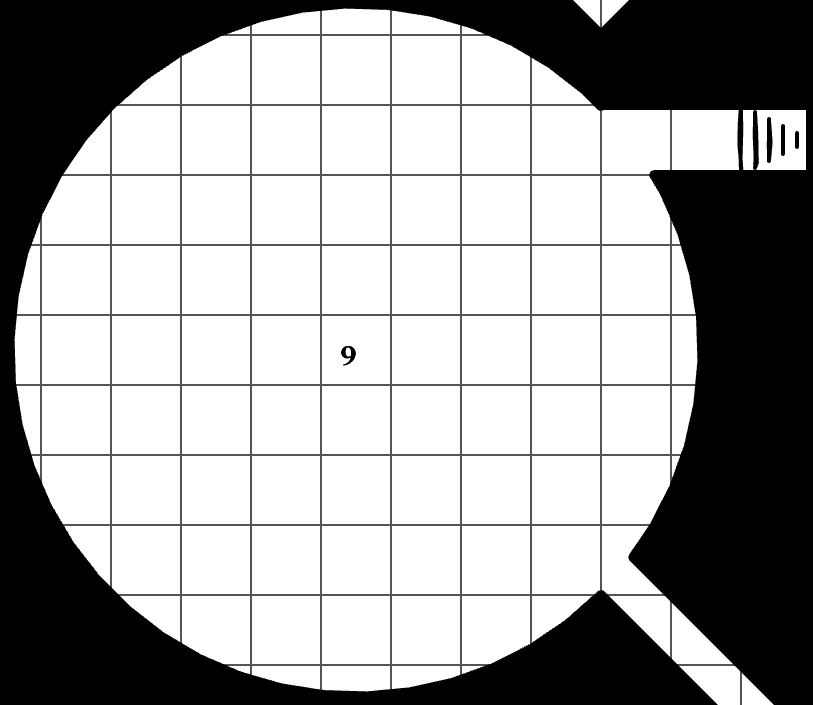
Area 9: Grand Amphitheater
Stone grandstands with five tiers of benches line three quarters of the outside of this room and a sand covered playing field occupies its center. The field is covered in four-toed footprints and clots of blood and sand. In between the stands on the northeastern side, a set of stairs descends down to level 4.
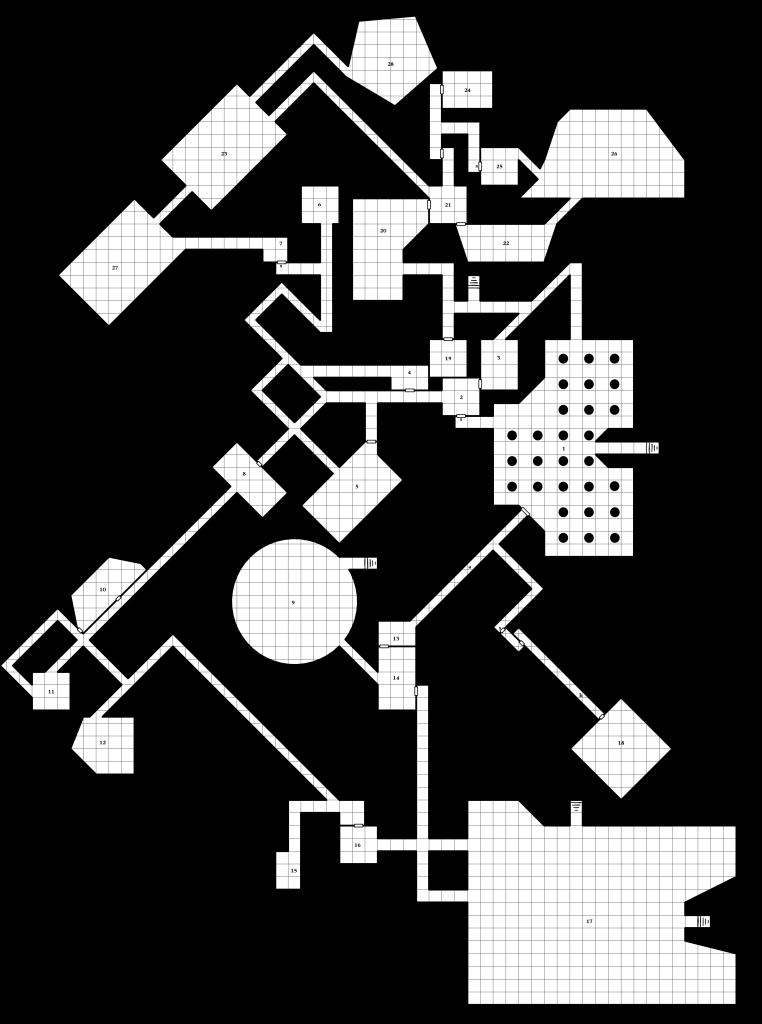
The first week of February has been way too busy but here we are back with my progress so far on the second level of the dungeon, The Vaults of Phonoran. A solid half of this level will be taken up by the lair of the lizard-men we met on the first level.
Area 1: Hall of Chaos
This massive chamber is filled with 28 massive pillars of milky white stone, each with scenes depicting a different Demon god. The air here is relatively clear smelling with just a distant hint of sulfur that gets stronger near the exits. The door in the southwestern area of the wall is made of heavy unworked stone.
Area 2: Bare Room
Behind a secret door at the end of the dead end hallway that heads directly out of Area 1, this room is roughly hewn out of the surrounding stone. It seems to have been stripped bare of any signs of its original function but the extinguished campfire is still warm in the center of the area. An iron door leads out of the room to the northeast and a hallway leads out on the western wall.
Area 3: Lizard-Men Nest
This room has been mostly stripped of all its furnishings which are now piled up in the center of the room to form a nest in which about 10 or so Lizard-Men seem to be curled up inside.
Monster
Lizard-Men (10) AC 4 (steel lamellar and shield) HD 2+1 (8 HP) Move 6” Treasure Carried: 1,000 gp between them
Treasure
2,000 sp and 500 gp in metal urns that are scattered throughout the Lizard-Men nest
Area 4: Divination Room
The north, south, and east walls of this area are lined with scroll racks, some of which still contain scrolls of ancient lore. A hexagram of silver dust is impressed into the floor.
Area 5: High Crypt Priest’s Chambers
This area was once the room of the priest in charge of the vaults eons ago. Now it is occupied by a nest of 8 Lizard-Men and their treasure hoard.
Monster
Lizard-Men (10) AC 4 (steel lamellar and shield) HD 2+1 (8 HP) Move 6” Treasure Carried: 2,000 gp between them and the leader has a spear +1
Treasure
1,000 sp and 500 gp piled near the nest
Area 6: Black Knight Crypt
The eastern and western walls of this stark stone chamber each have three marble sarcophagi along their lengths. These sarcophagi belong to the corrupted nights that once served the fell lich king Phonoran and the lid of each is carved in the likeness of its occupant.
Area 7:Black Knight Crypt
The eastern and western walls of this stark stone chamber, that’s hidden behind a secret door at the end of a dead end hallway, each have three marble sarcophagi along their lengths. These sarcophagi belong to the corrupted nights that once served the fell lich king Phonoran and the lid of each is carved in the likeness of its occupant.
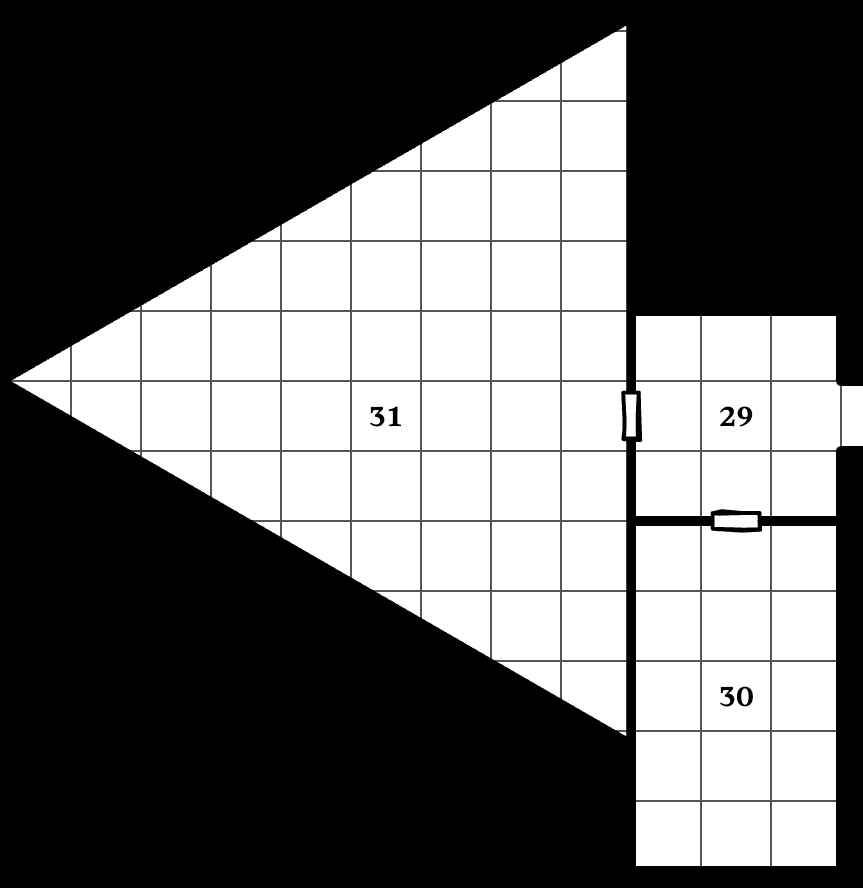
Area 29: Looted Antechamber: This stone chamber is mostly devoid of any meaningful furniture or decoration. On the southern wall there is a heavy stone door decorated with a scene of Nergal’s glory and on the western wall is the rotted out remains of a wooden doorway.
Area 30: Black Knight Crypt: The eastern and western walls of this stark stone chamber each have three marble sarcophagi along their lengths. These sarcophagi belong to the corrupted nights that once served the fell lich king Phonoran and the lid of each is carved in the likeness of its occupant.
Area 31: Embalming Workshop: Stone slabs intended for embalming the dead occupy most of the room. The scent of formaldehyde sets deep in the air, making it a little hard to breathe for too long. A set of stairs descends to the next floor in the northwestern wall.
Area 26: Black Knight Crypt: The eastern and western walls of this stark stone chamber each have three marble sarcophagi along their lengths. These sarcophagi belong to the corrupted nights that once served the fell lich king Phonoran and the lid of each is carved in the likeness of its occupant.
Treasure: The third sarcophagus on the eastern wall contains a military pick +1.
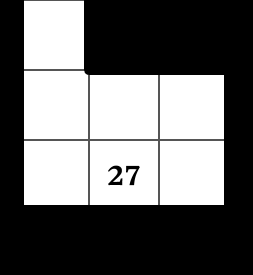
Area 27: Black Knight Crypt: The eastern and western walls of this stark stone chamber each have three marble sarcophagi along their lengths. These sarcophagi belong to the corrupted nights that once served the fell lich king Phonoran and the lid of each is carved in the likeness of its occupant. The Black Knight in the second sarcophagus on the western wall has been reanimated to guard this place and will attack the characters if its sarcophagus is disturbed.
Reanimated Black Knight (1) AC 3 (full chain hauberk and shield) HD 4 (14 HP) Move 6” Energy Drain: When a Reanimated Black Knight scores a hit against a character in combat, that character loses one experience level and all of its corresponding benefits except for noble ranks, titles, and incomes. Characters reduced to below first level by this ability are turned into a Wight. Characters otherwise killed by a Reanimated Black Knight are also turned into a Wight under the control of the Reanimated Black Knight.
Treasure: The sarcophagus with the Reanimated Black Knight in it also contains 7,000 aerii, 1,000 cents, and 2,000 shillings and an arming sword +1 (the Reanimated Black Knight uses this in combat).
Area 28: Nergal Chapel: This area is a chapel dedicated to the Chaos God Nergal, Lord of Undeath and Pestilence. It is exceptionally well preserved with candles still burning in their alcoves and the statue of Nergal and altar untouched, without a single bit of grime on them. A faint chanting can be heard from behind the altar.
Area 22: Sand-Flooded Chamber: This chamber’s original purpose seems lost to time as it is flooded with five feet of sand.
Area 23: Empty Room: This room has been vandalized to the point of being unrecognizable.
Area 24: Elevator Room: In the center of this room there is a white marble cistern placed on a marble plinth. If a character steps within 20 feet of the plinth the whole room descends 2 levels (guaranteed on a 1-2 out of 6 unless the players actively say they are skirting around the outside).
Area 25: Abandoned Sleeping Chambers: Once the sleeping chambers of some ancient wizard, this room has been stripped nearly bare.
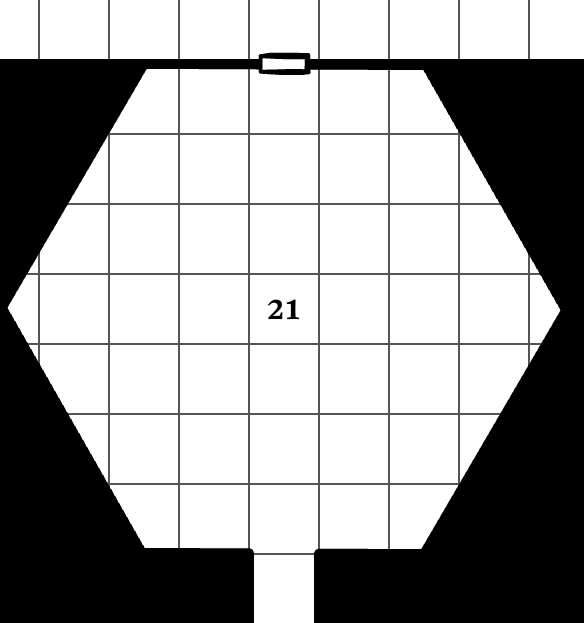
Area 21: Entrance Hall to the Vaults: This area is entered through a heavy stone door on the northern side. All six walls are lined with remains of statues of humanoid figures that have been smashed to bits and a cold haze hangs in the air. Graffiti in some ancient, long forgotten tongue is scribbled on the southern wall.
Area 18: Flooded Larder: This area was once a root cellar for the demolished building above but a recent rainstorm has flooded the sewer overflow and backed up into it. The floor slants downwards, falling 5 feet over the course of the room’s 30 foot span. Sewage filled water has filled the room up to the shoulders of an average sized person on the western end, while only being about an inch deep on the eastern end. The western was hosts the remains of a rotted out wooden door and a sturdy locked iron door.
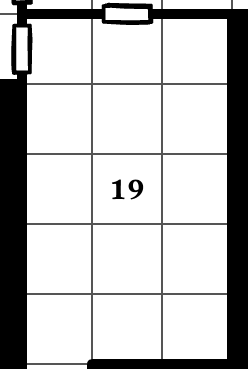
Area 19: Flooded Wine Cellar: The walls of this room are lined with wines of various vintages in trestled shelves. Sewer water fills the room up to 3 feet deep. The northern wall features a rotting wooden door and the southern wall has a passage leading out of it.
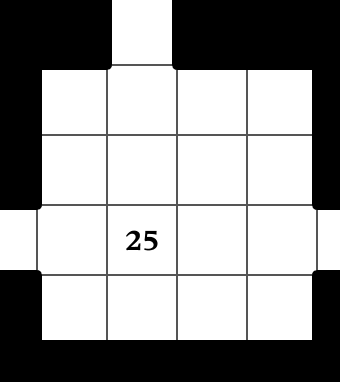
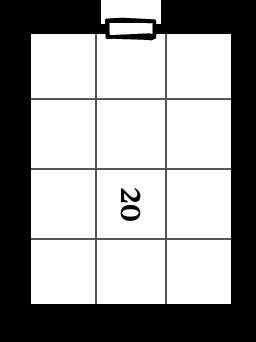
Area 20: Ossuary Chamber: This room is behind a locked iron door coming down the hallway from Area 18 and then covered by a stone that must be rolled aside behind that. Both sides of the chamber have carved stone shelves in which ossuary boxes are placed. The chamber once held 50 such boxes, now all but 6 have been stolen.
Treasure: The remaining ossuary boxes contain 500 sp and 40 gp between them. One made of exceptionally well polished stone with the name “Quintus” etched into it also contains a shield +1.
Area 15: Sewer Alcove: In this overflow section of the sewers a small alcove has been cut out and a small shrine to the ancestors of a long extinct family was built in it. There is an iron door on the southern end of the room.
Area 16: Tavern Basement: This area is the basement of The Pewter Mug Inn, a popular and active tavern in the Adventurer’s District. It is guarded by a heavy locked iron door.
Area 17: Hidden Laboratory: This area is filled with bubbling alchemical experiments and glowing runes. Inside the laboratory is the chaotic magic-user Iminox. During the daylight hours she is working away at her experiments, during the nighttime she has an apartment in the district above. When she is in her laboratory she is guarded by 4 warriors that she had hired.
Iminox AC 9 HD 1+1 (4 HP) Move 12” Spellbookdetect magic, sleep, hold portal, read magic, charm person Prepared Spellscharm person, sleep
Description: Iminox is a pale, thin woman with long ash blonde hair and pale grey eyes. She wears black silk robes with a red lining.
Personality: Iminox is a rather jovial person and is rather happy to converse with adventurers who do not attack her. She always knows 1d3 random rumors about happenings in the city. She is rather clumsy and has extreme allergies to almost every sort of pollen. She has a tendency to dismiss those who are not educated in the arcane arts
Laboratory Guards (4) AC 4 (steel lamellar and shield) HD 1 (5 HP) Move 6”
Imonix’s Treasure: wand of detect secret doors & traps and a bag of holding
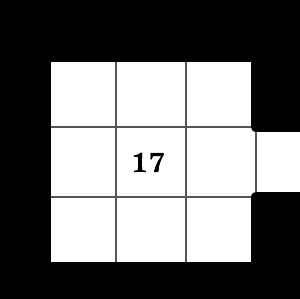
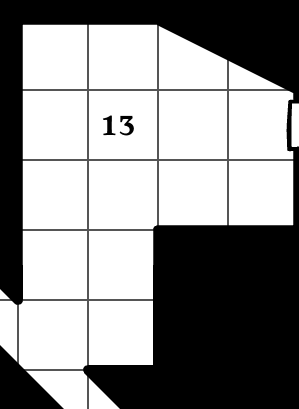
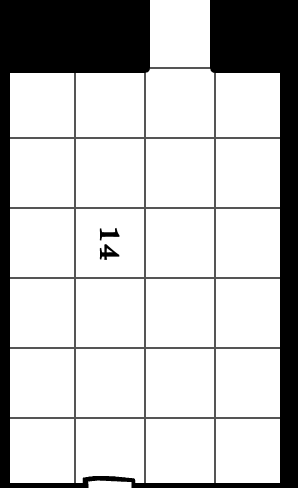
I’ve found that even though I work on these everyday, posting every other day on this project just allows more time for other things. So without further ado areas 13 & 14:
Area 13: Dwarf Clan Hold: This area was once the basement of some sort of building from ages past but is no longer accessible from the street above. In the years since the demolition it has become inhabited by a clan of sewer dwarves who resent the elf lords on lower levels. The eastern wall of the room has a locked portcullis on its northern end.
Sewer Dwarves (17) AC 5 (steel lamellar) HD 1 (3 HP) Move 6”
Treasure Carried: the clan has a collection of gems and gold worth 1,300 shillings
Area 14: Spoiled Larder: This mostly empty room is filled with shelves that contain hundreds of pounds of rotten food.